Traci Anello

The Power in Food


Leave a comment

Whoopie Pies, Love, Mom

All I can smell is the dark chocolate cakes coming out of the oven. It’s that really rich strong smell of what will soon be a whoopee pie. It’s the only memory I have of my mother and it’s a very faint one.

My mother passed away when I was 4 years old. I always heard about her baking and how much of a positive impact it had on people. Any time I asked about her, baking was always the first thing people would say. Mom made the best whoopie pies. She also made these incredible doll cakes with their large ball gown the size of a mixing bowl. Then she would put a doll into the center of the cake up to her waist where mom would seal with a beautiful buttercream waist band. She would pipe what seemed like a million stars to cover the gown. With three daughters, I can only imagine she made these cakes often.

It wasn’t until I owned my own bakery in Wells, Maine that I decided to make them for everyone. I spent a lifetime searching for her recipe. In the meantime, I just made the best whoopie pie I could think of. Mine were made with strong brewed coffee in the cake. Once they were cooled, I filled them with a sweetened buttercream. They never hung around very long in the bakery. It still wasn’t my mom’s recipe but it worked for the time. I sold somewhere in the neighborhood of four dozen a day during the week and up to eight dozen on the weekends. I’ve even made a wedding cake out of whoopie pies. Everyone that walked into the bakery would comment on the scent of dark chocolate cake coming from the ovens. It’s those comments that would bring me back to the only memory of mom. It kept it alive for me. If I could offer people a lifetime of great memories associated with the scent of chocolate cake just like I had experienced, it was a major win for me. That’s what food is all about.

I always make them by hand mixing them in a bowl. The real trick to the whoopie pie cake is getting the consistency right. If the batter is too loose, the cakes will spread. If the batter is too thick, the cake will be hard and not like a soft chocolate pillow. It takes experience but once you figure out the feel, you’ll never forget it. I prefer to hand mix most of my recipes just for that reason. It’s so important to have the feel. That’ll keep you from over mixing recipes which can cause problems. Generally over mixed batters can’t relax resulting in a tougher cake. Once mixed, I then line a baking sheet pan with parchment paper so my cakes won’t stick. I line them up like soldiers in a four by six pattern using a yellow handled ice cream scoop. This keeps them all the same size. I bake them and then pull them out of the oven to cool where they can be seen and smelled. While the cakes are cooling, I whip up a sweetened buttercream using real local butter softened so it whips up nice and fluffy. I sift powdered sugar into the butter and add real vanilla. I finish it with a pinch of salt and bring it all together in my KitchenAid mixer with the whip attachment. Once the cakes are cooled, I flip half of them over and use red handled ice cream scoop to add the filling. Pop the top on and you have a classic New England Whoopie pie. You can get creative with the fillings and add peanut butter or peppermint. You can even color the filling to match a school or college colors. There’s so much room to be creative with these. You can make mini ones and even make a birthday cake out of one.

When I was in my early 50’s, I finally asked my cousin Lori if she had her mother’s recipe. I figured if I’m never going to find my mom’s, I know her mom made really good ones and that’ll be a little closer to me. When I asked her she told me that it was the same recipe my mom used to use!! She said both of our moms used the same recipe! She sent me a picture of the original hand written recipe. I was so thrilled. I looked at the recipe and of course she used Crisco. How oringinal! I’m not a fan of Crisco and I don’t use it but the rest of her recipe was very similar to mine. Her filling used canned milk. I thought that was interesting. That certainly would have kept it sweet! I spent a lifetime searching for her recipe and I had access to it all along. This is definitely the time to say “Better late than never”.

I love to make these desserts for anyone. Every time I do I feel like a piece of my mom is still working through me. I feel the same love I imagined she put into each and every one. It’s a tradition I wanted to keep sharing. It’s her legacy to make great tasting baked goods from her heart. It’s all I have of her. Every time I make them and someone says thank you I just want to tell them to thank my mom.


Leave a comment

The Holiday Prep List

Today is October 31st. For me, it’s the official start to holiday season. This is the time I come up with new holiday recipes and I also pull my best out of the archive. I know what my family likes and I do my best to meet their expectations every year. It’s not hard to do because it’s really what you put into what you’re doing aside from ingredients that makes these offerings special. It’s the thought first and foremost.

My family is pretty simple. My dad loves spicy pumpkin cheesecake with a graham cracker crust. He also loves any cookie with anisette. His parents were from Sicily so food is important to this guy. He’s 89 this year so I believe between his DNA and his ability to seek good food have done him more good than a walk around the block. So the  first item on the prep list is pumpkin. Got it. Next is my daughter, Ronni. She has just moved out West for a wonderful new job. I’m very happy for her and at the same time I miss her every day. We have spent every holiday baking or cooking together. This is the first year we will be doing it 2000 miles apart. Fear not, it will get done. This is the part where I say it’s not the ingredients that make the end results, it’s the love you put into them. This is the year I’ll be sending baked goods and ingredients to her home. Ronni and I are both plantbased so it’s pretty easy to create new gifts for her. I’ve managed to take her favorites and transform them into plantbased approved with the same great flavor. It doesn’t matter how many miles separate you and your loved ones. It’s the passion to create for them that will make it all feel like home. If you have family you want to bake for, just plan on doing it a little earlier than normal so you can allow for the shipping time. I always send my packages early because it’s that element of surprise that I love to give people. Expect it when you least expect it from me.

My sister Kim’s family loves cookies. We have a chocolate chip cookie recipe we have been sharing for years. So much that now her 11 years old daughter, Alice, is making them. That’s really the best part of the story for me. My niece is carrying on the tradition. Last year we began a new one of making homemade cinnamon buns. Alice is ready to start making desserts that are more advanced now. She loves baking and I love helping her. THAT’S what the holidays are about. My sister always invites new friends over. I love Thanksgiving at her house. She embraces the true meaning of being thankful. We always have a lot of good food, music and conversation. Her prep list is the grand turkey and an abundance of vegetable dishes that are colorful, nutritious and something new for everyone. This is a wonderful opportunity for me to introduce plantbased dishes. That’s our secret. No one knows.  Also on that list are fresh herbs (most from her outdoor garden), beautiful flowers from the farmers market and the perfect wine to compliment the entire meal.

As I’m writing this, the leaves are falling from the trees and the cats (Bear and Chaos) are convinced they’re going to catch them. They sit in the window crouched down and ready. Speaking of the boys, they have their own little prep list. Every year they get turkey and gravy on Thanksgiving and beef and liver on Christmas. The holidays are stimulating with all of the decorations. It takes a lot of energy to knock the bulbs off the Christmas tree so a good meal is essential for them. Insert eye rolling emoji here. I love these two and they are just as much of the celebrating as anyone.

As you begin to think of what you want to make this year, here are a few ideas that will make holiday baking much easier and fun. Every year I use the same shortbread dough to make a variety of different cookies and bars. It’s an easy 4 ingredient recipe: Organic flour, butter (I use vegan), confectionery sugar and salt. This recipe takes flavors and other ingredients like chocolate and nuts like it owns them. For cookies  I make chocolate and raspberry linzors, stained glass cookies, holiday shapes and almond hearts with the shortbreads. other cookies I do are Mexican wedding cakes, my dad’s favorite anisette cookies, our famous family chocolate chip and my very own plantbased compost cookie. For bars using the shortbread I make chocolate walnut bars, Southern bourbon pecan squares , Citrus lemon bars and Maine blueberry bars. My next blog will have some of these recipes and any others just request them and I’ll send them over your way with one condition: You share it with someone else and you find a child to make them with. That’s all. Let’s keep this cool holiday baking thing moving forward.

Whatever you decide to make whether it’s for family, your local police station, the school, your co-workers or even yourself, remember the first ingredient is love. You use that one and everything else will come out just fine. This is the power in food.


Leave a comment

You need that cake when??

One of the most common lines I’ve had to say repeatedly on the phone. Usually at 3pm, when the kitchen is cleaned and I was getting ready for the next day. Or finally getting a chance to sit with a customer and have a nice cup of well deserved tea. The phone would ring and on the other end, a frantic caller with the request,”Can I pick up a birthday cake in about an hour?? I hope you have what I want because this person is specific about what they like.”. Nice cup of tea just became the 7pm iced tea. With a deep breath, my reply would be that I don’t have that actual cake (or maybe I did by a stroke of luck) but I’ll make something that will work. The answer was never “no” but options. Hey, when you wait until the last-minute, options are better than no.

Important questions are: What’s the occasion, favorite colors, and flavors and the most important question absolutely ever: Are there any allergies. Once you have this information you can start your game plan. This is equivalent to overtime at the Superbowl. You have to think fast, work quick and deliver on time.

Cupcakes are a great way to make something quick and come as close to the requested flavor as you can. They can look very festive, decorative, simple or elegant and in a flash. Generally they take 15 to 18 minutes. While they are in the oven, prepare the frosting, icing or ganache (ga-NASH). so it’s ready to go once the bailout cakes are cooled. Put them in the freezer for a quick chill.

I always have ganache on hand, everyday all day. It’s your kitchen duct tape. It will fix everything. Here’s a nice recipe I’ll share:

1 cup of 1/2 and 1/2 and 1 cup of chocolate chips (semi sweet). That’s it! Place the 1/2 and 1/2 in a 4 cup microwave safe bowl. heat until just before the boiling point. Remove and add the chips. Let it sit for 5 minutes. Whisk together. When you first start to whisk, it looks like you’re getting no where but keep going. It’ll come together. This liquid gem is ready to use. Just dip the cupcakes in the ganache and let the excess drip off. Place on a plate and repeat until they’re all done. They will look decadent and shine. You will be the master chef of the day. Sometimes after they set, I’ll add a sugared violet or other flower. You can also frost the cupcake and then drizzle the ganache.

The sweet part about ganache is that’s the dipping stage when it’s first made. Let it sit at room temperature and it will solidify so you can use it as a frosting. Put it in the fridge and you can scoop it and make truffles. I’ve seen people dip bacon in it and sprinkle coarse salt on top. Keep it on hand and you’ll quickly realize why I call it sweet kitchen duct tape.

Gluten free friends, this applies to you too. Pipe some ganache in the middle and then put the top on and frost it. It’ll help make you a household name to gluten-free. Make sure the chocolate chips you are using are gluten-free of course.

So the next time you find out the night before that you’ve been nominated to make the main event for the next day’s festivities, try this option of making cupcakes.

School moms, make cupcakes and freeze them. Lots of them. Be ready. It’s going to happen. Frost them right from the freezer and by the next day they’re ready. Don’t panic. If you find out while you’re pouring that day’s orange juice you need a dozen asap, they’ll defrost by lunch time.

It’s a quick fix to a last-minute request. It works for any occasion too. You can do this and I’m here to help. If you have any questions, please feel free to ask them here. If you’re a cupcake officiando, post your work. I’d love to see it and so would everyone else. Bake on!


20121026-210515.jpg

20121026-210529.jpg


1 Comment

Bakers insurance that’s easy and affordable

Bakers have all types of tricks to our trade. You learn the basics from your mom, grandma (or pop) and just thoughtful people who like to teach. Some still use lard. Others use pure butter or a blend of some sort.These are used to coat the baking pan with a dusting of flour.  Everyone has their method.

Those of us in the food industry use a piece of kitchen equipment that is a multi tool: Parchment paper. Cue the music: “Alleluia”.

I love parchment paper. Now this might seem like a rather odd subject to post about but trust me, after you read it, you’ll understand why it’s the second most important tool in the kitchen besides your Kitchen Aid mixer. There are so many different ways to use it. The most common in the kitchen is with baking cakes and tea breads. It’s why I call it insurance. Your cakes will never have that annoying divot of missing cake on the bottom when you take it out of the pan. It will be neat, clean and ready to frost, virtually crumb free. Just place your pan on a piece of parchment paper and trace with a sharpie. Can’t find it? It’s in that junk drawer. Then cut just inside the circle. Spray your pan with non stick spray and place the circle on the bottom of the pan.Sometimes if I have enough paper, I’ll cut out a number of circles so they’re ready for the next cake. You can do the same for tea breads or any breads that would normally stick like cinnamon swirl or apple bread. Cut the rectangle circles out to fit the inside of the pan.

Another use is for making a paper cone so you can write on your cake or make drizzle marks on your cake or cupcakes. Just cut out a triangle and fold around to form a cone. I use a small piece of tape to secure it. I’ve been laughed at by fellow pastry chefs for using the tape but it was I who had the last laugh when they had a ganache blow out on the side. Ha!

A third and healthy use is with baking and steaming fish and vegetables. I love this method. Healthy, quick and very little if any cleanup. Cut out a circle about 12 inches. Fold the paper in half and then open it up and lay flat on a cookie sheet.Place your fish and vegetables in the center. Squeeze a little fresh lemon juice and add a few herbs (dill is nice with fish). Fold the paper over to make a half-moon and then tuck the seams under to seal. Bake at 350°. Depending on your fish I would haddock is pretty quick so a 6oz piece about 20 minutes. Salmon maybe about 30 to 35. Be careful when you open the bag because there will be quite a bit of steam. You’re going to love this method!! Just another insurance that your fish won’t stick to the paper.

Remember when you were a kid and you made snowflakes with paper?? You folded a circle in half and then in half again and again til you were dizzy. Then you cut shapes and opened it up to make a pretty (or really ugly!) snowflake. That same method can be used to make a stencil for the top of a simple cake. Spray on side of the parchment with non stick spray and lay that side down on the cake. Then dust the top with powdered sugar or cocoa. Carefully lift the paper off and what a beautiful design!!

There are so many ideas. I could go on all night. You can even wrap cookie dough logs in parchment and freeze them. I roll pie dough on this paper, cookie dough, my stained glass cookies and gluten-free pizza doughs…so many things. They will not stick. During the rolling out process you still need to flour the paper but it seriously will not stick.

There are a couple of ways to get parchment. At the grocery store which is the most expensive in my opinion. When I had my bakery, I used to sell it by the sheet to customers. Just go into a local bakery and ask if they have any parchment paper they can sell you. I was more than happy to help my customers. It was a great way to rest assured they would return but most important, if I gave them the right help to make it themselves, that’s a win in my book. What I can teach you, you can pass on to someone else. If we all work together, we can make this a baking nation again. Now I just put the words insurance and nation in the same post. That’s pretty risky. But I guarantee THIS insurance will work for everyone and is very affordable.


Leave a comment

Spooky shortbreads

Yesterday I wrote about gingerbread houses and how they are not just for Christmas anymore. Today I wanted to share with you very simple ideas with shortbreads. If you are making gluten free cookies, these same rules apply. Remember, just because they are gluten free doesn’t mean you have to miss out on the fun.

The cookies in the picture are a plain shortbread that is filled and drizzled with semi sweet chocolate. I then added two little eyes for a “mummy” effect. You want to put the eyes in while the chocolate is still wet so they will stick. You can use any filling you want. You can even make these as a chocolate shortbread with a white chocolate drizzle. Raspberry jam with the chocolate drizzle and little eyes could look just as creepy and still taste great. The goal here isn’t just to make a scarey cookie. It’s to create a scarey cookie that looks, well, scarey but tastes really good.

The little eyes can be purchased online at the website: http://www.cakedeco.com. This is Pfeil and Holing and they will have just about every conceivable sugar decoration you could ever think of and ever need. While you’re on this website, check out some of the cookie cutters they have. The bone cutter is really cool. You can make a sandwich cookie with them and use the chocolate or raspberry filling. The top can get more chocolate or just dust it with confectionery sugar. When I had my bakery, we used to make them and call them “Good boy people treats”. The joke was if you got your husband to do anything on the “honey-do” list, then you could reward him with a bone. That’s a true story. It was funny at the time. We sold alot of them. I can tell you that!

The whole idea behind making fun food is you get the chance to be creative and give someone something you made that is actual special. Even mummy cookies can be special. Think outside the box! This is alittle off the cookie subject but those of you who know me know sometimes you really have to follow what I’m saying because I bounce from topic to topic and eventually come back to what we were talking about. Sorry but these wheels are constantly turning! Anyway, here’s a great little dessert for kids. It’s called “Worms in a bucket”. Now this is outside the box! Actaully it’s in a bucket. Usually at a dollar store you can find mini plastic sand buckets. Fill them 3/4 of the way with chocolate pudding. Use the instant kind. You’re not being graded on this assignment. Then take gummy worms and stick them half way in the pudding with some hanging over the edge. Use chocolate cookie crumbs and sprinkle quite a bit of them all over the top like dirt. If you have some shortbread bones, stick them in for fun too. Worms in a bucket!! You will be the coolest parent for sure! If you’re going to a big party, use a big bucket and watch people dive in. Did you see how I tied the shortbread into this?? See, I came back to the original subject.

The nice thing about making shortbreads is that they freeze really well. If you have a free day, make a batch and freeze them undecorated. Then they’re ready when you need them. Just pull them from the freezer and decorate. The fun part about making these cookies is they cut very clean from the cookie cutter so it’s an easy one for kids. Most shortbreads do not have raw egg so they can sneak some dough and you don’t have to worry about them getting sick. If you have an allergy to dairy, just substitutue Earth Balance for the butter. Don’t use margarine (yuck) because it has added water in it and it will show as bubbles in your shortbread. I use Cabot unsalted butter and I love it!

Visit cakedeco.com and after you “flip” through the pages, your wheels will start to turn too. Baking is fun and baking new cookies means starting new traditions. Every holiday brings new ideas. Halloween is a fun one because even if it gets messy, it’s Halloween. Break the rules!


Leave a comment

Gingerbread houses are not just for Christmas…

When you think of gingerbread houses, you think of Christmas and the snow capped roof, decorated trees and the festive feeling of the holidays. What about the rest of the year?? Gingerbread is not just for Christmas. It’s for any holiday or even just for fun.

You could even make a gingerbread house for a friend who has just bought a new house or camp. Wouldn’t it be fun to give them a house made to look like the one they just purchased?? No? Not so much? We’ll stick to the holidays for now but someday you’ll thank me for that little plug.

The house in this picture is a haunted gingerbread house made entirely out of edible pieces except for the base it stands on. The idea came to me while at my bakery I had a conversation with a customer who said she couldn’t wait for the holidays because she loved making cookies and candy houses. So I asked her why she was waiting for Christmas. Make them for now. I told her by the weekend I’ll have a haunted house and send her the pictures (she was from out-of-state).

So I started this house like I do all of the others, with a cardboard template. I built the initial model out of cake boards and put it together. Then the fun part begins. This is where your creativity side comes out. You have to think haunted and then think of food products to match. So I searched online for haunted houses and after about what seemed like a thousand but was only maybe 100, I had a good idea about what I wanted. Just staring at the pictures, I wanted trees with no leaves, ghosts, bats, pumpkins stained glass windows and broken shutters. Pastillage (pronounced: PA-stee-aj) is made from sugar and corn syrup. You roll it our like fondant or pie dough. It gets hard really fast so you have to work quick. With the help of a co-worker, we used this for most of the work other than the actual gingerbread. We used the rice Krispie treats to make the land and a base for the house. The trees were made from grape stems. Now some would argue that’s not edible but I would disagree. You can eat it. You just won’t enjoy it. It’s edible. Once the house is up, the decorating begins. Be creative. By the time we were done, we stood back and took a long look. It was fun and it was pretty awesome. It was a great piece for the customers to look at. The local paper came in and took pictures that was in the paper right before Halloween. It really drew quite a few customers which was really nice for us.

The best place to start is to draw your house out of cardboard and tape it together. Keep it small enough to work with. You’re not moving in. Cut out your windows and doorways. Then untape it and trace your dough around it. Bake the gingerbread and then let it cool at least over night but two days if you can. Let it sit out so it gets nice and dry. The best part about a haunted house is if you accidentally break a piece, ice it together. It’s a haunted house. It does not have to be perfect and you don’t want it to be. I always make two sets so I have backup ready. What I mean by that is I always have extra pieces because you never know when you’ll need them and you don’t want to wait two days for replacement parts.

To make the stained glass windows, just lay the gingerbread flat on a baking pan and place crushed life savers (like a powder) in the window and make sure the candy is touching all four sides of the window. Bake as usual. This is a great way to make stained glass cookies. Then once the window is baked and cooled, you can crack the window like a broken window. Let your mind have fun. Cool effects like these will make you a cool adult to the kids.

The best part for me was the more people who looked at this house, the more people I was hoping would take this idea and run with it. How many were going to go home and create a house of their own. How many kids were about to have a great time with an adult and learn about making these houses. How many of those children would grow up and someday make one with their own kids. See where this is going?? This is how I like to teach. If you plant an idea and make it easy to do, people will follow. This is how new traditions are created. If even one person tries this idea by reading this blog, one more child in the world just benefitted from quality time. And this all started over a simple conversation.

*Gluten free friends, you can make any gingerbread house you want as well. GF gingerbread dough works just as well. There’s no reason why you can’t be in on the fun too. Make the pastillage (no gluten there) and the icing (no gluten there either). Take a traditional recipe and substitute Gf all-purpose flour and xanthan gum.


Leave a comment

Gingerbread on Broadway

The first semester of culinary school can be a bit nerving. You have to learn about new instructors, meet other students and prepare for your hands on lab classes. What you’re not quite prepared for is the invitation for 5 students to compete in a gingerbread contest in New York City on Broadway known as The Gingerbread on Broadway at the Marriott Marquis . It gets better. These are 5 students who have never baked a cookie, rolled a rolling-pin across a sheet of gingerbread let alone 120 sheets of gingerbread, used a commercial convection oven or a 30qt. Hobart mixer…until now. This gingerbread house had to be made entirely out of edible products. How hard can that be?? Read on…

The challenges come into play when the contest is first announced. Everyone wants to go. Now the weeding out process begins. This contest requires 40 hours of work which is after class 4 days a week. You have to participate in every class. There’s a lot of work that has to be done by everyone. One by one they filed out the door until there was 6 (one alternate). We’re building a team. I thought this was more of a challenge than building the house or transporting it 5 hours in a rented van.

Eventually we build a team and the work begins. For me, the most important condition was that who ever was in this, wanted to learn. They were willing to listen and try new techniques. This is all about learning. It’s a quick crash course on baking and decorating but more important, a course on trust and working together.

First order of business is what to build. They decided they were representing Maine and a lighthouse was the perfect way to do that. They chose the Nubble Lighthouse as a team. My insides were saying, “A light house? And it has to travel all the way to NYC down the Massachusetts Turnpike and through the streets of New York?? Don’t scare them. Keep this thought to yourself”. And so I did.

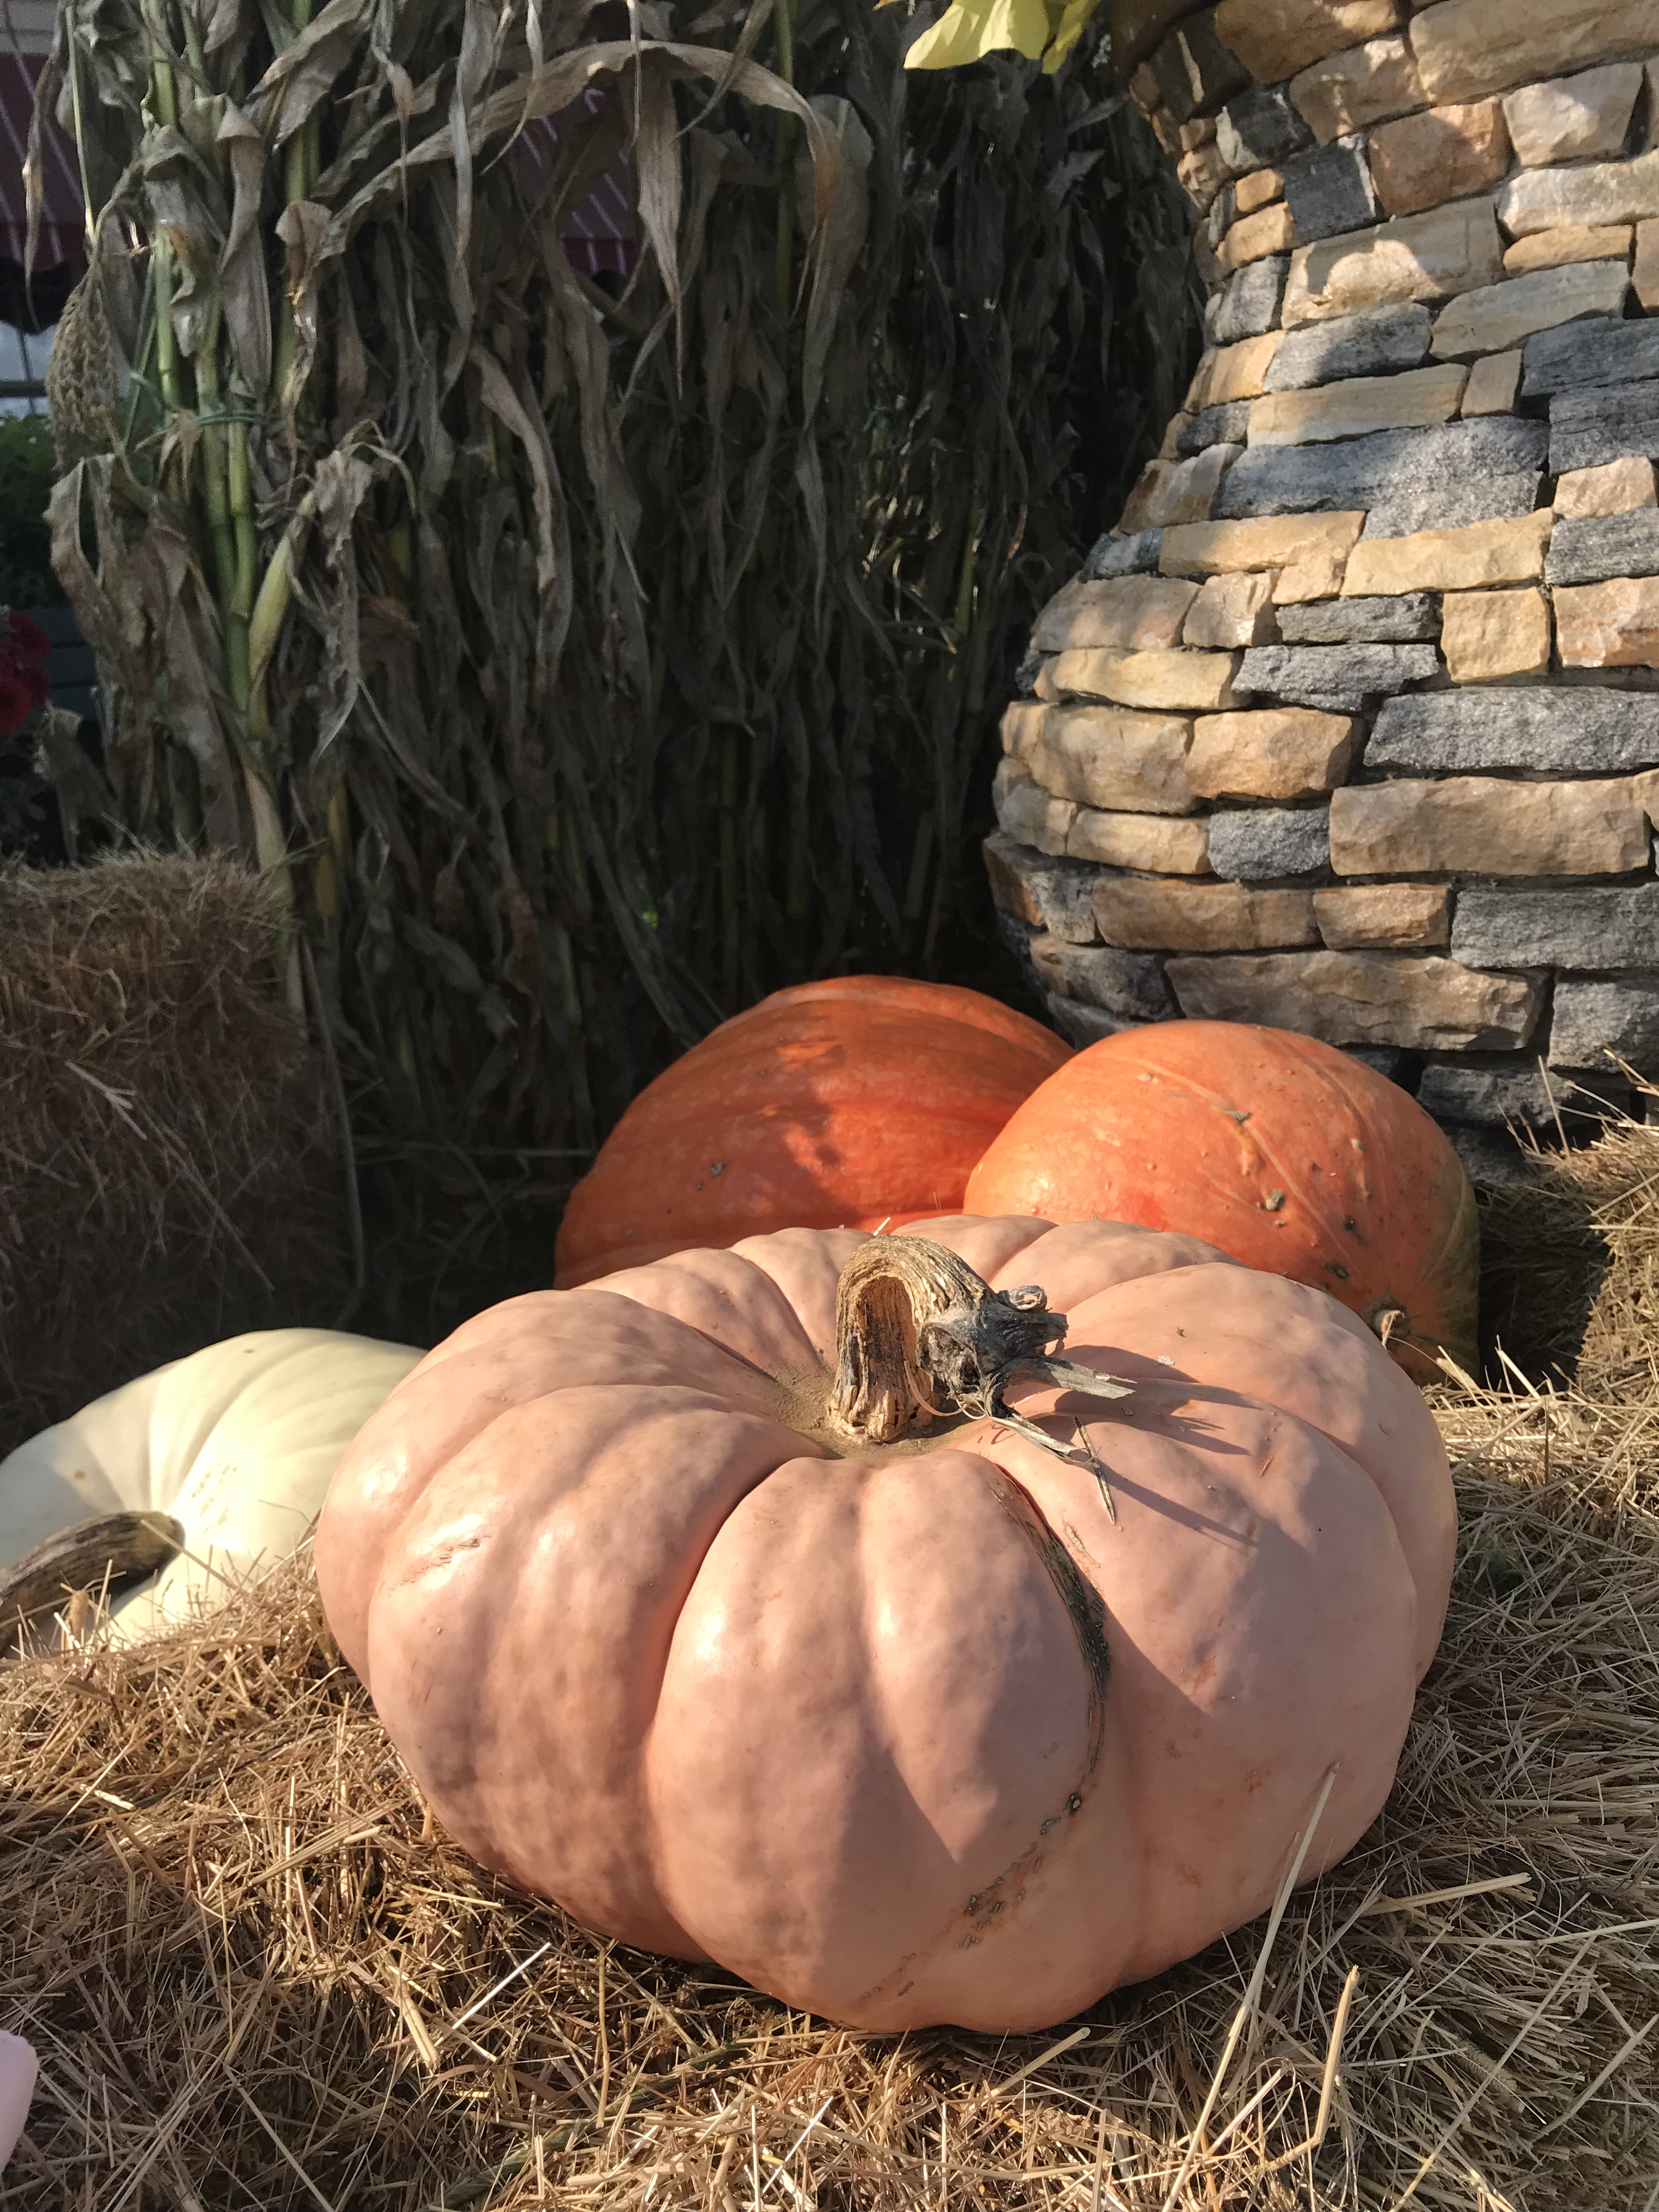
We start by building the house out of cardboard and constructing it together. This became our template. Then a quick course on mixing and rolling out dough. This was not so easy. Not a problem as this is where the learning continues. Then we had to decided how to stabilize the house. After staring at the picture of the Nubble for what seemed like hours but was only one hour, it was decided that the land would be made out of Rice Krispie treats and we could dig a foundation to sit the house in. Genius! I have learned that two of my team members work construction during the summer.As I learn the members, I learn their strengths. I have another person who loves to make beaded jewelery. She was perfect for the window work and trim. Each night was a new experience. There was excitement, tension and a lot of concentration. These would eventually be students in my baking and pastry class the next month. The house is constructed and now the creativity for the outside begins. We have a sugar made santa in a boat. This actually happens at the Nubble every year so that was important to include. We made lobster traps all out of sugar, a rocky shore and Christmas trees decorating the yard made with local candies. You can’t see them but behind the house are woodpiles made of pretzels and two cats playing in the snow. We used writing gel for the water. We used and made so much candy!!! It looked great!! I was so proud of my team.

Travel time! In all of my years making wedding cakes, I can tell you the delivery is the most painful. If it’s going to happen, it’s during the delivery. The entire night before, I prayed that every horrible driver  take the day off from work. We loaded the van and created a “crash” kit of extra gingerbread, candies, icing, pastry bags and Tylenol. After a long drive and solid white knuckles and a lot of laughs, we arrived.
We made it in one piece as did the house. However, we made the maximum size house allowed under the rules. No one told use we had to reserve a handicap room if we did that. The house wouldn’t fit in our room.I offered to sleep with it in the lobby but the staff said no. How out-of-place would I have looked sleeping in the lobby in New York? After a conference with the hotel staff, our house got its own suite, two floors a bar and a piano. We could not sleep in the suite but our gingerbread house would be safely locked in the room with a window view of Times Square.

After a sleepless night, we retrieved our gingerbread house and went to the conference room to set up. The room was decorated beautifully. There were 6 other schools there. We were the underdogs. I brought the students around to meet the other schools and to check out their work and make mental notes for next year. The judging began and consisted of culinary experts, architects and hotel staff. We walked away and sat in the next room chatting about the other incredible houses. My students were up against some pretty well known schools. I had complete faith in them because I watched them all grow in 6 short weeks. Once allowed back, the judges would come to your table and critique the work. This was a very important step for the students to experience. The awards were announced except for the People’s Choice which the public votes on and they have 3 weeks to do so while your house is displayed. Unfortunately we did not win the grand prize. I explained it was the People’s Choice award they wanted. It’s the award chosen by the public. Just three more weeks.  I told the students they were winners long before we arrived here. They learned to build a team, work together, be creative, learn several new skills and put together a beautiful gingerbread house. There wasn’t much I could say to make them feel better. It was a long ride home.

Three weeks later, we get the call from the Marriott. We won the People’s Choice award!! The students were thrilled!! The college was thrilled and the local news covered the story.

This was the most incredible 6 weeks I spent with brand new students. We all learned so many lessons including myself. We walked away with an award, new skills and most important, new friends.

Gingerbread houses don’t have to be this big. Start with a small house for little hands. Build a tradition with your kids or in the community. It builds strengths, courage, self-esteem and creates memories that will forever be remembered.


Leave a comment

Fall in love with gluten free baking

Tonight is the night I am going to try to put a stop to the panic attacks gluten-free baking tends to bring on. I’m not handing out any meds here just straight sound advice.

When a person had been diagnosed with celiac disease, it feels as though your world of fine cuisine fades away with the evening sun. It’s over. You have to adjust to cardboard with powdered sugar for dessert. Cardboard with tomato sauce and some kind of cheese for pizza and you have to toast every tiny piece of bread you get your hands on. Well, those days are over.

The competition for gluten-free foods is at an all time high right now. There are amazing products popping out of kitchens made by families who decided they’ll make their own food. This is a good thing. Competition is a wonderful tool to motivate every producer, baker and chef to improve what’s being made every day. That means one thing. Better products every day. How would you feel if I said the best products will come out of your own kitchen? Perhaps I need the meds? Wrong answer. Read on.

What I want to share with you is a very easy secret that I want you to share with everyone you know. Every recipe for cakes, pies, cookies and whoopie pies (It’s a New England thing.) you have in your old recipe box is every recipe you’ll ever need to be the best at what you do. Why you ask?? Because these recipes are traditions in your family that you are going to be able to pass on to your children gluten-free or not. Those cookies you remember as a child with your mom or grand mother are the same ones you’ll enjoy every holiday. The trick? Just substitute a good All-purpose gluten-free flour cup for cup and a little xanthan gum for stability. That’s it! I converted every recipe I used in my traditional bakery to gluten-free successfully. Don’t be afraid. You can do this. It seems the panic attacks come from all of the weird ingredients and different flours. Don’t worry about that. Just get the flour and let the gluten-free gurus do all of the work figuring out what flour goes with what.

The best recipe to try this method with is brownies. They are pretty fool-proof and most brownie recipes have very little flour. Just try it. Every weekend I make pumpkin donuts and apple donuts by using my recipe for pumpkin bread and apple bread. I simply substitute Gf flour and add some xanthan and before you know it, you have everyone’s attention with the Fall aroma. No one will ever know they are gluten-free.

There are some other tricks I’ll share with you as I go. The real kicker here is you don’t have to invest in a ton of cookbooks that you don’t need. It’s all right there at your fingertips. All I ask is that you take a deep breath and focus on the fun behind the food you will create. When you realize how easy this can actually be, you’ll enjoy cooking and baking again. You’ll find your creative side and fall in love with it all over again.

20120925-225738.jpg


2 Comments

How it all started…In my sand box

As I started to think about what to write tonight, I had this thought about how it all might have started. I’m going to give you a quick trip back to the 70’s. Don’t worry. There won’t be any funky music or bad perms. This is just a fun look back at how I started at what would eventually become my life long career in the food service industry as a chef.

When I was quite small sometime back in the 70’s, my dad built my 2 brothers and two sisters as well as myself a sand box. It was a good-sized sand box so that at least three of us could play in it at the same time. I have to admit, when there were three of us at the same time, it never ended well. Most of the time I would wait them all out and have the box to myself. One day I decided to mix some sand with water and “bake” them in the sun on the ledge of the box. I got them to the point where I could flip them over like a pancake. This was pretty cool. I started to experiment with different textures to see which types of sand (which was all gluten free by the way) would work best. This really happened. At my young age, I suddenly had created my own “job” everyday and my lab was my sandbox. Lucky for me we didn’t have cats so “sand castles” were not a problem until later when our neighbor started harboring cats. Then and only then their cats became a work hazard. Anyway, Everyday I knew if the sun was shining, the office was open. On rainy days, I would sit in my room and sob. I just wanted to go outside and play.

Little by little, utensils would be missing from the kitchen, the spatulas, the strainers and eventually a cookie sheet. Finally my dad took a walk outside and would retrieve his kitchen tools (which were really mine by then because possession is nine-tenths of the law). Not in dad’s court.

He decided one day to get me an Easy Bake Oven. It might have been Christmas time. The first time I think I went through all of the mixes in about one hour. I was a master. I already learned about textures in my own sand lab. Now I had to learn to read directions and follow them. To this day if I had the internet back then, I would have sent them an e-mail to tell them they needed to adjust the textures. I would go outside and pick fresh native blueberries and put them in everything. I have to say “Bless my father”. He was a real sport. Dad worked two jobs and every time he would come home and try to take a quick nap, I was knocking on his door to give him another treat. He ate every one of them. I was on to something.

One day I ran out of mixes and went through the cabinets to look for anything I could bake. Ah, a box of jello? Certainly I could make this work. I mixed the jello and put it in the little two-inch pan and gently slid it into the oven. It took about 1 minute and suddenly it sort of exploded and covered the light bulb. What a let down. First I thought I failed and would never be able to bake again. Then I had a young person’s panic attack and thought it was back to the sand box. Lightbulbs! In the hall closet! I was back in business.

When I was out of mixes, I would try pancake mix. At this point, I was more interested in the science about what I was making than the actual recipe. That would all fall into place when the time was right. It wasn’t all about the taste but the textures.

Fast forward some 30 or so years, this is how I bake today. I taught college level culinary arts for about 8 years. I couldn’t take them all outside to play in a sand box to play with different sands so I created different types of flour to see how well they could come up with the right combination of flour and water. Just as I had done in my sand lab. I teach people that recognizing what the batter looks like is as important as how it will taste. If the texture isn’t right, the outcome won’t be either. Just ask the jello.

20120924-214822.jpg


1 Comment

Back to pie crust…Crimping

To crimp or not to crimp…Not a famous quote but probably should be.

Crimping a pie crust is as individual as you are. It’s a necessary step to a successful pie and the one you create becomes your signature.

In Webster’s Dictionary, crimping is defined as “To cause to become wavy, bent or pinched as in to pinch or press together in order to seal”. Well said. Now if Webster’s had a sense of humor they would finish the definition with : “Because if you do not seal properly, you’re going to have a blow out and a heck of a mess to clean up”. That’s the truth. Even though it’s a necessary step, it’s a decorative step as well. Remember, if the pie looks amazing, it’s already starting to taste amazing.

The different styles depend on how you’re feeling that day or if you have developed your own signature way. At some point you’ll make enough pies that you develop your own style. Mine is the simple yet effective “pinch”. The pinch is when you take your thumb and pointer and create a “v” with your tips. Then you take your opposite pointer and press it into the “v”. Each time you will place your thumb in the last crimp. This is a very popular method. The clown ruffle is a crimp that is smooth and looks just like the ruffle around a clown’s neck. Use the same thumb and pointer on one hand and then turn the opposite thumb flat to create the shape.Some others are the dreadful looking fork press. Just take a fork and smash the two crusts together. Not attractive at all but it’s out there so I’ll just consider this a for warning. Remember, what you do outside the crust, reflects the inside. If you’re ever with someone who is doing this, now’s the time to show them a beautiful decorative crust. Best excuse for you to rescue them and cover up that mess. The decorative look is after you finish the crimp, make small cut outs like little leaves or circles. Egg wash the entire crimped crust and then lay each leave on the crust overlapping the last. Leaves are especially nice for this in the Fall. I have posted the pie crust with the circle overlay to show you. I have also posted a picture to show you how to do the entire crust with circles. This is a nice trick because you can create vents without intentionally puncturing the crusts. Just leave small vents when you lay the circles down.

If you’re making a gluten-free crust, working with small circles is a very easy way to work with that crust. It can be a challenge to move a large circle without cracking it. Whether you’re gluten-free or not, these tips work very well for any pie.

If you are making a single shell, it’s a really good idea to make the complete shell already with the crimping done and then freeze it. You only have to freeze it for an hour but remember, you have butter in the crust (you better be using butter!) and as soon as it hits that oven, it might want to relax. This is just an insurance to be sure your quiche or cream pie (heavens!) will hold up. I like to make a batch of pie dough and then make them all single shells and have them ready to go in the freezer.

So that’s my lesson on crimping. I never thought there was that much to know but I guess once you start talking about it, there’s more than you think. There’s more than I thought! Feel free to add any ideas you have. Remember to have fun. Making pies with kids and watching them create their own styles (sorry about the mess) is actually more fun than eating the pie itself. It’s almost time for the holidays so you have plenty of time for a few dress rehearsals. How bad can that be? Here’s a quick tip: If it’s that bad (including the blowouts): Regardless of what it looks like, save it by putting a serving of the pie mess in a dessert glass and add a scoop of ice cream and another scoop of the filling. People will think you made the best dessert ever! And do you know what? You just did.

20120923-204827.jpg